Tuesday, July 14, 2015

Mint Brownies

I'm a lover of mint brownies, as you can probably surmise from this post.  While I really love BYU's mint brownies, I have a special place in my heart for Kneader's mint brownies.  They were actually served at my wedding reception.

Last summer we were in Utah, and we went to Kneaders for such a treat, only to find out that their mint brownies are now considered "seasonal" and only served during Christmastime.  I was totally bummed.  So I searched the interwebs and found this recipe, which looked like a good match.  Not only are these fairly close to the real deal, but they are actually BETTER than Kneader's version!  They have a fresher taste, are slightly lighter, and just plain amazing.  This is now my go-to brownie recipe.  They transport well, hold their shape, and are a crowd-pleaser for sure.


Mint Brownies
Recipe slightly adapted from Amy Nash's Tastebook, via Christine Fischli

Brownie Base:
  • 1 cup butter
  • 4 ounces unsweetened chocolate
  • 4 eggs
  • 2 cups sugar
  • 1/2 teaspoon peppermint extract
  • 1 cup flour
Mint Filling:
  • 6 tablespoons butter, softened
  • Powdered sugar (about 1 lb.)
  • 2-4 tablespoons milk
  • 1/4 teaspoon peppermint extract
  • 6-8 drops green food coloring
Chocolate Glaze:
  • 6-8 ounces semi-sweet or milk chocolate chips
  • 6 tablespoons butter
 Directions:
  1. For the brownie base, melt butter & chocolate together over double boiler, then allow to cool a bit. Beat eggs and sugar until frothy, about 5 minutes. Add melted chocolate, blending well. Stir in peppermint extract and flour just until combined, then spread into a greased 9x13 pan. Bake at 350 degrees for 20-25 min. Allow to cool completely.
  2. For the mint filling, cream butter and powdered sugar, adding milk as needed to make a soft frosting. Add peppermint extract and food coloring, beating to a smooth consistency. Spread over cooled crust, and allow to set. (May want to refrigerate until firm).
  3. For the chocolate glaze, melt chocolate chips with butter on low heat over stove or by 30 second intervals in microwave. Stir constantly. Cool slightly and spread or drizzle on top of frosting.
  4. Refrigerate until set. Cut into bars. Keep refrigerated.

Eaton Mess

When we were in England last time, Janet ordered this dessert at the Carvery Restaurant.  I thought it was interesting to name a dessert what I thought was "Eaten Mess," but it seemed like a good description - it's basically just broken meringue cookies, sliced strawberries, and whipped cream all mixed together - literally a mess in a bowl.  Nothing elegant here, but actually quite yummy.  

Years later, Janet made us this simple dessert and I commented on how funny the name was - "Eaten Mess."  Janet explained that it isn't "Eaten," it's "Eaton."  It originated from the Eaton Boy's Academy in England (where much of British royalty has attended), when the young pupils had accidentally broken the delicate meringue cookies during a picnic, and didn't want them to go to waste.  Thus this dessert was improvised, and "Eaton Mess" was born!


After I had this the first time, I found myself craving it quite a bit.  I'm don't care much for strawberry shortcake, but this is a close compromise.  It's a great summer dessert when strawberries are in season, and quite light and refreshing.  A perfect compliment after a heavier meal.  

Eaton Mess
Recipe from Janet Diestler

Ingredients:
  • 1/2 cup heavy cream, whipped
  • 6 meringue cookies, crushed
  • 1/2 cup strawberries, diced
Directions:
  1. Combine the above ingredients - simple as that!  
  2. Please note that this recipe is for a single serving. 

Nanaimo Bars

I was first introduced to Nanaimo Bars at our ward's annual international potluck.  Our bishop's wife, Sister Bennett, is Canadian and made these traditional cookie bars.  I was hooked from the first bite, and have found myself craving them often since then.   

I decided to try my American hand at making these amazing Canadian treats, and I'm so glad that I did.  These are literally one of my top 10 favorite desserts of all time (at least for the moment).  I don't know how these haven't caught on in the states, but I'm thrilled to have this recipe in my repertoire.


These pictures show a slightly flawed dessert, as the top chocolate layer should be smooth and shiny.  Unfortuatnly, I didn't have any semi-sweet baking squares, so I used Ghiradelli chocolate chips.  Big mistake: Ghiradelli chocolate chips don't melt down very well.  Next time - I'll use either Nestle chocolate chips or the recommended baking squares.  But don't let these pictures deter you - they really are an amazing dessert!


Nanaimo Bars
Recipe slightly adapted from All Recipes

Cookie Ingredients (Bottom Layer):
  • 1/2 cup butter, softened
  • 1/4 cup white sugar
  • 5 tablespoons unsweetened cocoa powder
  • 1 egg, beaten
  • 1 1/4 cups graham cracker crumbs (I just use one sleeve of graham crackers)
  • 3/4 cup flaked coconut
  • 1/2 cup finely chopped almonds
Custard Ingredients (Middle Layer):
  • 1/2 cup butter, softened
  • 3 tablespoons heavy cream
  • 2 tablespoons custard powder*
  • 2 cups confectioners' sugar
Chocolate Ganache Ingredients (Top Layer):
  • 4 ounces semisweet chocolate baking squares
  • 3 tablespoons butter
Directions:
  1. In the top of a double boiler, combine 1/2 cup butter, white sugar and cocoa powder. Stir occasionally until melted and smooth. Beat in the egg, stirring until thick, 2 to 3 minutes. Remove from heat and mix in the graham cracker crumbs, coconut, and almonds. Press into the bottom of an ungreased 8x8 inch pan.
  2. For the middle layer, cream together 1/2 cup butter, heavy cream and custard powder until light and fluffy. Mix in the confectioners' sugar until smooth. Spread over the bottom layer in the pan. Chill to set.
  3. While the second layer is chilling, melt the semisweet chocolate and 3 tablespoons butter together in the microwave or over low heat. Spread over the chilled bars. Let the chocolate set before cutting into squares. 
*I use a British baking staple called Bird's Custard Powder that can be found in the international section of your grocery store or World Market.  You can also do an exact substitute with vanilla pudding mix powder.

Cheesy Brocolli Chicken Cassarole

I love a good casserole.  I think the ease of throwing everything together in one pan really appeals to me. Lately though, I've been avoiding casseroles.  Although I love them, I've been trying to get away from "cream-of-something" soups.  I've begun reading labels, and when I recently looked on the back of a Campbell's soup can - I felt like I was looking at a chemistry set.  A very yummy, incredibly easy chemistry set. Sigh. 

So although I love many of my recipes that include this ingredient, dishes with it are being made less and less in my house (I can see this phenomenon evolve as I look over past recipe posts on this blog).  I'll still throw together this recipe on occasion, but I really do feel better about avoiding these soup mixes altogether.  


When I saw this recipe posted on Our Best Bites, I nearly glossed over it because of said new convictions.  However I was thrilled to see that this recipe includes a 100% homemade base, and it's delicious!  Super easy to throw together in one dish, just like any good casserole recipe should be. 


I found this awesome microwavable rice/quinoa mix at my grocery store, and it complements this recipe wonderfully.  It's called Seeds of Change Quinoa & Brown Rice, and it's delicious!  If it's just Alex and me, I'll halve this recipe - it makes a lot!

Cheesy Broccoli Chicken Casserole
Recipe slightly adapted from Our Best Bites

Ingredients:
  • 2 tablespoons butter
  • 1/2 large onion, chopped (about 1 cup chopped onion)
  • 2-3 cloves garlic, minced
  • 1/4 cup all-purpose flour
  • 2 cups low-sodium chicken broth
  • 1/2 teaspoon salt
  • 1/4 teaspoon black pepper
  • 1 1/2 cups cheddar cheese, divided (grate it off the block; don’t use pre-grated cheese)
  • 4 cups bite-sized broccoli florets
  • 3 cups cooked brown rice or brown rice/quinoa mixture (like Seeds of Change or Uncle Ben’s)
  • 3 cups bite-sized cooked chicken (I use a Costco rotisserie chicken)
  • 1/2 cup freshly shredded Parmesan cheese
Directions:
  1. Preheat oven to 400 F.
  2. In a large saucepan, melt the butter over medium heat. When melted, add the onion and garlic and cook, stirring frequently, until fragrant and the onions are translucent. Add the flour and stir until it starts coming together with the butter and the onions. Slowly add the chicken broth, a little at a time, whisking after each addition until any lumps of flour are smooth. Cook, stirring frequently, until the mixture coats the back of a spoon. Add the salt and pepper and remove from heat. Add 1 cup of shredded cheddar and stir until smooth. Add the broccoli.
  3. While the sauce is cooking, spray a 9×13″ baking dish with non-stick cooking spray. Combine the chicken and rice in the dish. After you’ve added the broccoli to the sauce, add it to the rice/chicken mixture and stir to combine. Sprinkle with the shredded parmesan and the remaining 1/2 cup of cheddar cheese. Cover with aluminum foil and bake for 25 minutes or until casserole is hot and bubbly. Serve immediately. Makes 8 servings.

Texas Sheet Cake

I'm not a huge cake person in general, and I'm quite picky about the cakes I'll willingly eat (like this one).  However, I do love a good Texas Sheet Cake.  I have fond memories of enjoying my Aunt Gayle's version at our Memorial Day family reunions; this is the perfect dessert for a large crowd.  There's just something about the chocolate/buttermilk flavor and warm icing that makes me swoon.  

When my sister was here last Spring, she had a hankering for this sinful treat, so we put it together at about 10:00 pm one night.  As you can see, some of us prefer it with nuts, while others don't (I happen to be in the "no nuts" camp on this one - why change something so perfect in it's purest form?). 


Texas Sheet Cake
Recipe from good ol' Betty Crocker

Cake Ingredients:
  • 2 cups all-purpose flour
  • 2 cups granulated sugar
  • 1/4 teaspoon salt
  • 1 cup butter
  • 1 cup water
  • 3 tablespoons unsweetened baking cocoa
  • 1/2 cup buttermilk
  • 1 teaspoon baking soda
  • 1 teaspoon vanilla
  • 2 eggs, slightly beaten
Frosting Ingredients:
  • 1/2 cup butter 
  • 3 tablespoons unsweetened baking cocoa 
  • 6 tablespoons milk 
  • 2 1/2 cups powdered sugar 
  • 1 teaspoon vanilla 
  • 1 cup chopped pecans (optional)
Directions:
  1. Heat oven to 325ºF. Spray 15x10x1-inch baking pan with cooking spray.
  2. In large bowl, stir together flour, granulated sugar and salt; set aside.
  3. In 2-quart saucepan, heat 1 cup butter, the water and 3 tablespoons baking cocoa to boiling. Remove from heat. Pour over flour mixture in bowl; stir until well mixed. Add buttermilk, baking soda, 1 teaspoon vanilla and the eggs; stir until well blended. Pour into pan, spreading evenly.
  4. Bake 22 to 25 minutes or until toothpick inserted in center comes out clean.
  5. Meanwhile, in another 2-quart saucepan, heat 1/2 cup butter, 3 tablespoons baking cocoa and the milk to simmering. Remove from heat. Beat in powdered sugar and 1 teaspoon vanilla with whisk until smooth. Stir in pecans (optional).
  6. Pour frosting over hot cake. Cool completely before cutting, about 1 hour. 

Hootenanny Pancakes

This is one of my all-time favorite breakfast foods!  Some people call this dish a "German Pancake," but I've known it as a "Hootenanny Pancake" from the first time I made this recipe in Home Economics.  Whenever I'm having one of those moments when I'm starving, don't feel like going out, and haven't been grocery shopping in weeks - this is what I make.  It's so easy to throw together, and I always have these simple ingredients on hand.  

When I first made this for Alex, he stated it was simply a big Yorkshire pudding. I don't think it's quite the same - this is more of a sweet dish, rather than savory.  But I can definitely see the similarities, especially in the way its prepared.  Maybe that's why I took to Yorkshire pudding so quickly.  :-)


Hootenanny Pancakes
Recipe from I'm a Lazy Mom 

Ingredients:
  • 1/4 cup of butter (half a stick)
  • 1 cup flour
  • 1 cup milk
  • 1/2 tsp salt
  • 6 eggs
Directions:
  1. Set oven to 425 degrees.  Place butter in a 9x13 glass pan, and put in oven to melt while preheating.  
  2. While butter is melting,  combine flour, milk, salt, and eggs in blender.  Blend until mixture is frothy, scraping down the sides occasionally. 
  3. When oven has reached 425, and butter is completely melted (it will be sizzling at this point), quickly pour mixture into glass pan and bake for 25-30 minutes.  It will puff up significantly.   No peaking, as opening the oven door will deflate the pancake. 
  4. Serve with whatever breakfast topping you'd like - syrup, powdered sugar, or fruit. 

Sunday, June 7, 2015

Guacamole

Surprisingly, I wouldn't go near an avocado until about 3 years ago.  The green slimy consistency just turned me off.  Then our friends, the Ricker's, introduced us to the homemade guacamole at Burrito Parilla, and I've been hooked ever since.  I could seriously eat avocado every day - I crave it all the time, and I do eat it several times a week.  Good thing it's a "healthy fat," amIright?

There's a million ways to make guacamole, but this just happens to be my favorite.  I sort of threw this recipe together simply by adding ingredients I like, and eliminating the ones I don't (red onions = evil).  Enjoy!


Guacamole
Recipe created by me!  

Ingredients:
  • 3 Avocados - pealed, pitted, and mashed
  • 1 Lime - juiced
  • 1/2 tsp. Garlic, minced 
  • Pinch of Salt
  • Pinch of Cayanne Pepper
  • 1 Roma tomato - diced (remove the seeds and ribs first)
  • 1 Jalapeno - diced (seeds and ribs removed)
  • 3 Tbsp. Onion - diced
  • 2 Tbsp. Cilantro - chopped
Directions:

Mix avocados, lime juice, garlic, salt, and pepper.  Gently fold in diced tomato, jalapeno, onions, and cilantro. 

Cafe Rio Tomatillo Dressing (Copy-Cat)

Another recipe to serve alongside all the Cafe Rio Knock-offs is this Tomatillo Mexican Dressing.  My first time cooking with tomatillos, and it did not disappoint!  Also a close match to the real deal. 


Cafe Rio Tomatillo Dressing (Copy-Cat)
Recipe from some lady at my Mom's church

Ingredients:
  • 1 package Original Hidden Valley Ranch
  • 1 cup Buttermilk
  • 1 cup Mayonnaise
  • 1/3 bunch cilantro
  • 2 tomatilllos
  • 1 green serenno or jalapeno pepper*
Directions:

Combine all ingredients in a blender or food processor.  Refrigerate 1 hour before serving. 

*I take the rib and seeds out of my peppers because I'm a bit of a wimp when it comes to heat.  However, you can leave them in if your palate prefers a bit more spice. 

Cafe Rio Cilantro Lime Rice (Copy-Cat)

Served with the *Not* Cafe Rio Chicken, this Cilantro Lime Rice recipe is a pretty close match to the real deal.  It may look a little different in the picture, but that's because we use brown rice instead of white (and because I'm not a great photographer).  Still tastes just as good though, and also pairs wonderfully with the Cafe Rio Sweet Pork Burritos!


Cafe Rio Cilantro Lime Rice
Recipe from some lady at my Mom's church

Ingredients:
  • 4 T. butter
  • 2 1/2 C. rice
  • 4 1/2 C. chicken broth
  • 1 1/2 tsp. salt
  • 1/2 tsp. cumin
  • Black pepper, to taste
  • Juice of 3-4 small limes
  • 4 T. chipped fresh cilantro leaves (set aside)
 Directions:
  1. In a large pan or rice cooker, melt butter and the add the rice to coat.  Add broth, salt, cumin, black pepper, and lime juice.  Mix well and cook covered about 20 minutes.  
  2. Remove from heat and allow to set for 10-15 minutes.  
  3. Add cilantro leaves and fluff with a fork.

*Not* Cafe Rio Chicken

Oh how I long for Cafe Rio!  Ask anyone in the western portion of the country, and they will exclaim what joy it brings.  There are many good things about living in the Midwest, but Mexican food isn't one of them.

One of my favorite dishes from Cafe Rio is the chicken salad.  The meat is seasoned and cooked to perfection, and I truly don't think there is any better way to eat chicken.

Unlike my knock-off sweet pork recipe, this chicken recipe does not resemble that of Cafe Rio's chicken in any way.  This recipe is floating all over the interwebs claiming to be the exact same thing, but I am here to tell you it's not even close. I don't know how people could possibly mistake it to be.

However, it is an exceptionally good chicken crock-pot recipe, that is amazing on salads, so I will definitely be adding it to my repertoire.  Alex absolutely loved it.  But again, please - and I can't stress this enough - do not refer to this as Cafe Rio chicken.  It's not.
 

*Not* Cafe Rio Chicken
Recipe from Chef in Training

Ingredients:
  •     2 lbs chicken breasts
  •     8 oz. zesty Italian dressing
  •     ½ Tablespoon minced garlic
  •     1 packet ranch dressing mix (mixed with ½ cup of water)
  •     ½ Tablespoon chili powder
  •     ½ Tablespoon ground cumin
Directions:

Place all ingredients in a crock pot. Cook on LOW for about 5 hours or until chicken is done.  Shred with fork and serve in salads, burritos, tacos...etc.

Sunday, March 1, 2015

Loaded Baked Potato Soup

I love a good baked potato soup, and I have tried unsuccessfully to make it in the past.  It always came out tasting like sour cream and flour (and I really don't like the taste of sour cream - it has to be well-hidden in all of my recipes!).  When I found myself with some left-over potatoes, I knew it was time to search once again for the perfect recipe.

This recipe is so much better!  It's creamy, cheesy, bacon-y, and perfect for a cold night (which seems to be the norm around here lately).  I didn't add any ham as the recipe calls for, but I think I will next time I make this because it could have used a bit more flavor.  I think I would also use regular chicken broth, rather than the low-sodium stuff I had on hand. 


Loaded Baked Potato Soup
Recipe adapted from Betty Crocker

Ingredients:
  • 6 slices of bacon
  • 3/4 cups chopped yellow onion
  • 3 cups chicken broth
  • 1 lb baking potatoes, peeled, cubed
  • 1/3 cup butter
  • 3/8 cup all-purpose flour
  • 2 cups milk
  • 1/2 teaspoon salt
  • 1/2 teaspoon ground pepper
  • 1/2 cup diced cooked ham
  • 1/2 cup sour cream
  • 1 1/4 cups shredded sharp cheddar cheese
  • 1/4 cup sliced green onions
Directions:
  1. In a skillet, cook bacon over medium heat 6 to 7 minutes or until crisp; drain on paper towels. Crumble bacon; set aside. Reserve 1 tablespoon drippings in skillet. Cook yellow onion in bacon drippings over medium-high heat 6 minutes or until almost tender.
  2. In stew pot, mix cooked yellow onions, chicken broth, and potatoes. Heat to boiling; reduce heat. Cook 10 minutes or until potatoes are very tender.
  3. Meanwhile, in same skillet that you cooked the bacon, melt butter over low heat. Stir in flour with whisk until smooth. Cook and stir 1 minute. Gradually whisk in 1 cup of the milk. Pour milk mixture into potato mixture. Add remaining 1 cup milk, the salt and pepper. Cook over medium heat, stirring constantly, until mixture is thickened and bubbly.
  4. Stir in ham, half of the bacon, sour cream, 1 cup of the cheese, and half of the green onions. Cook until thoroughly heated and cheese is melted. 
  5. Evenly top individual servings with remaining bacon, cheese and green onions.

Saturday, February 28, 2015

Buttermilk Pancakes

Continuing on with our Sunday morning brunch tradition, I have discovered the perfect buttermilk pancake recipe!  I'm usually not much of a pancake person (I actually don't like the pancakes from breakfast restaurants), but these hot cakes are amazing!  I have made them two weeks in a row now!

The picture below isn't that pretty because I'm still not very skilled with the "pancake flip," but I'll get it right someday.  :-)


Buttermilk Pancakes
Recipe adapted from All Recipes

Ingredients:
  • 1 cup flour
  • 1 teaspoon salt
  • 1 teaspoon baking soda
  • 1 egg
  • 1 cup buttermilk
  • 1/8 cup milk
  • 2 tablespoons butter, melted
Directions:
  1. Preheat and lightly grease a large skillet or electric griddle (medium-low works best for me).
  2. Mix the flour, salt, and baking soda together in a bowl. Add the egg, buttermilk, milk, and butter; stir together lightly, but keep it lumpy. The batter should look thick, spongy, and puffy.
  3. Drop 1/3 cup of the batter onto the cooking surface, spreading lightly with the bottom of the cup. Cook until lightly-browned on each side, 1 to 2 minutes per side.

Creamy Pesto Eggplant Quesadillas

This is a great, quick week-night meal!  We don't do vegetarian meals very often (which I actually feel guilty about -- see this clip for my feelings on the matter), but this is a good one that my carnivore husband, Alex, even approves of. 

Prego now makes a Basil Pesto sauce that's really good, though Target also has an Archer Farm's Creamy Pesto sauce that's divine.  Both are delicious, so either one will work wonderfully!


Creamy Pesto Eggplant Quesadillas
Recipe adapted from Lauren's Latest

Ingredients:
  • 2 Tbsp. olive oil
  • 1 tsp. kosher salt
  • 1 eggplant
  • 1 zucchini
  • 1 cup mozzarella cheese, shredded
  • 4 Tbsp. creamy pesto sauce
  • 4 flour tortillas
Directions:
  1. Preheat oven to 425.  Line baking sheet with aluminum foil, and grease lightly with cooking spray. 
  2. Slice eggplant and zucchini into 1/4 inch slices.  Places slices on cookie sheet and using a pastry brush, brush each piece with olive oil.  Lightly sprinkle kosher salt on top.   
  3. Turn over each piece, and repeat step 2. 
  4. Bake for 20 minutes, turning slices over at least once during baking. Veggies will be done once they display a slight browning on each side. 
  5. When veggies are done, heat non-stick skillet on medium-low heat.  Lightly grease with cooking spray. 
  6. On a tortilla, layer 1 tablespoon creamy pesto sauce, mozzarella cheese, eggplant, and zucchini.  Fold over to make a quesadilla. 
  7. In non-stick skillet, heat each side of quesadilla until tortillas start to brown and cheese is melted through.  Enjoy!

Thursday, February 19, 2015

Biscuits & Gravy

Now that we have 1 o'clock church (boo), Alex and I have taken to making Sunday brunch each week.  Alex makes the best buttermilk bisuits, and his sausage gravy isn't too bad either.  :-)

This is one of Alex's favorite meals, and for good reason!


Southern Buttermilk Biscuits
Recipe from Food.com

Ingredients:
  • 2 cups unbleached all-purpose flour, plus more for dusting the board
  • 1/4 teaspoon baking soda
  • 1 tablespoon baking powder
  • 1 teaspoon kosher salt or 1 teaspoon salt
  • 6 tablespoons unsalted butter, very cold
  • 1 cup buttermilk (approx)*
Directions:
  1. Preheat your oven to 450°F.
  2. Combine the dry ingredients in a bowl, or in the bowl of a food processor. Cut the butter into chunks and cut into the flour until it resembles course meal.  Add the buttermilk and mix JUST until combined.  If it appears on the dry side, add a bit more buttermilk. It should be very wet (*we always add a few more tablespoons of buttermilk).
  3. Turn the dough out onto a floured board. Gently, gently PAT (do NOT roll with a rolling pin) the dough out until it's about 1/2" thick. Fold the dough about 5 times, gently press the dough down to a 1 inch thick. Use a round cutter to cut into rounds.
  4. Place the biscuits on a cookie sheet- if you like soft sides, put them touching each other.  If you like"crusty" sides, put them about 1 inch apart- these will not rise as high as the biscuits put close together.
  5. Bake for about 10-12 minutes- the biscuits will be a beautiful light golden brown on top and bottom.  Do not overbake.
  6. Note: The key to real biscuits is not in the ingredients, but in the handling of the dough.  The dough must be handled as little as possible or you will have tough biscuits.  I have found that a food processor produces superior biscuits, because the ingredients stay colder and there's less chance of overmixing. You also must pat the dough out with your hands, lightly.  Rolling with a rolling pin is a guaranteed way to overstimulate the gluten, resulting in a tougher biscuit.
  7. Note 2: You can make these biscuits, cut them, put them on cookie sheets and freeze them for up to a month.  When you want fresh biscuits, simply place them frozen on the cookie sheet and bake at 450°F for about 20 minutes.

Down Home Sausage Gravy
Recipe from Very Best Baking

Ingredients:
  • 1 (16 ounce) package fresh breakfast sausage
  • 2 tablespoons finely chopped onion
  • 6 tablespoons all-purpose flour
  • 2 (12 fluid ounce) cans evaporated milk
  • 1 cup water
  • 1/4 teaspoon salt
  • hot pepper sauce to taste
Directions
  1. Combine sausage and onion in large skillet. Cook over medium-low heat, stirring occasionally, until sausage is no longer pink. Stir in flour; mix well. Stir in evaporated milk, water, salt and hot pepper sauce. Cook, stirring occasionally, until mixture comes to a boil. Cook for 1 to 2 minutes.
  2. Serve immediately over biscuits.

Garlic Roasted Potatoes

I love mashed potatoes, but they are a lot of work.  So when I'm in a rush, this is my go-to potato recipe.   It's a nice side to a Sunday roast or meatloaf. 


Garlic Roasted Potatoes 
Recipe adapted from the Food Network

Ingredients:
  • 3 pounds small red or white potatoes
  • 1/4 cup good olive oil
  • 1 teaspoons kosher salt
  • 1 teaspoon freshly ground black pepper
  • 2 tablespoons minced garlic (6 cloves)
  • A generous pinch of dried parsley
Directions:
  1. Preheat the oven to 400 degrees F.
  2. Cut the potatoes in half or quarters and place in a bowl with the olive oil, salt, pepper, and garlic; toss until the potatoes are well coated. Transfer the potatoes to a sheet pan and spread out into 1 layer. Roast in the oven for 45 minutes to 1 hour or until browned and crisp. Flip twice with a spatula during cooking in order to ensure even browning.
  3. Remove the potatoes from the oven, toss with parsley, season to taste, and serve hot.

Mom's Mint Frosting

Growing up, we always got to pick out just what birthday cake we wanted my mom to make us on our special day (luckily, we were never exposed to those awful grocery store cakes with the thick fake frosting -- ick!).  Almost all of us would request chocolate cake with mint frosting. 

My mom makes the best mint frosting - it's not too rich or overly sugary, just a subtle minty thin layer of sweet goodness!  She doesn't use a recipe, and just kind of wings it.  I was craving it a few weeks ago, and decided to try to make a cake like mom's.  I'm happy to say that I think I've been able to quantify the ingredients!  Give this a try - you won't regret it!


Mom's Mint Frosting
From the Kitchen of Carol Hutchins

Ingredients:
  • 1/4 cup butter, softened
  • 2 1/2 cups powdered sugar
  • 4 tablespoons milk
  • 1/8 teaspoon mint extract*
Directions:

Beat the butter and powdered sugar until blended, slowly add the milk until desired consitency.  Stir in mint extract. 

*You may want to use more or less than this amount of mint extract.  This proportion came out to my desired minty-ness, but it was a touch stronger than mom's.  

Friday, February 13, 2015

Amish Roast Beef

A few years ago, Alex and I took a weekend trip to an Amish town called Nappannee (Indiana).  We had a lovely time, but one of the highlights was eating a "Thresher's Dinner" at an Amish restaurant in town.  The meal was a humongous feast of roast beef, fried chicken, homemade bread with apple butter, and more.  Apparently it was meant to feed the farmers a hot, filling meal after working in the fields all day.  Makes total sense, but not for us - we would probably need to burn off about 3000 calories to make up for this meal!


One of our favorite things on the menu was the roast beef. It was so tender and juicy, and had been roasting on a low temperature for several days - as per our waitress. 

Once we got back to Chicago, I couldn't stop thinking about that roast beef.  I looked for a recipe online, and found a cookbook sold through the restaurant. A few days later the cookbook arrived, and I excitedly bought the ingredients to make a Sunday roast.  Luckily, the directions did not require me to cook the meat for several days - but it turned out just as good!


Amish Roast Beef
Recipe from Amish Acres
Ingredients:
  • 5 lbs chuck roast
  • 3 T beef base*
  • 2 T meat tenderizer
Directions:

Cut roast in sliced 3 inch cubes. Put roast in casserole dish. Add meat tenderizer and beef base on meat. Fill with water and cook at 300 for 4 to 5 hours (start checking the beef after 2-3 hours).

*This is not beef broth, it's a short, squaty bottle labeled "Beef Base," and found in the soup aisle.

Thursday, January 8, 2015

Sticky Toffee Pudding

I find it so satisfying when I can add another British recipe to my repertoire!  British food is so hard to come by around here (obviously, since we're not in Great Britain), so I'm always having to learn to make my favorites from scratch.  Sometimes they turn out, sometimes they don't.  You can thank the metric system and hard-to-find British baking staples for that.

Fortunately - this is one of the recipes that turned out even better that I thought it would!  Its a warm date cake (aka "pudding")*, broiled with toffee sauce, and then topped with ice cream and more toffee sauce.  Heaven in a bowl, and one of my all-time favorite desserts.  One of our New Year's resolutions is to eat only one sweet a day, and this pan of goodness has been calling our names every minute of every day - its so hard to only have one serving!


Sticky Toffee Pudding
Recipe from Food Network

Ingredients:

For the cake -
  • 1 cup plus 1 tablespoon all-purpose flour
  • 1 teaspoon baking powder
  • 3/4 cup pitted dates
  • 1 1/4 cups boiling water
  • 1 teaspoon baking soda
  • 1/4 cup unsalted butter, softened
  • 3/4 cup granulated sugar
  • 1 large egg, lightly beaten
  • 1 teaspoon vanilla
For the toffee sauce -
  • 1/2 cup unsalted butter
  • 1/2 cup heavy cream
  • 1 cup packed light brown sugar

Directions:
  1. Preheat oven to 350 degrees. Butter a 10-inch round or square baking dish. 
  2. Sift the flour and baking powder onto a sheet of waxed paper; set aside. 
  3. Chop the dates fine. Place in a small bowl and add the boiling water and baking soda; set aside.
  4. In a bowl or electric mixer, beat the butter and sugar until light and fluffy. Add the egg and vanilla; beat until blended. Gradually beat in the flour mixture. Add the date mixture to the batter and fold until blended with a rubber spatula. The batter will be very runny.  
  5. Pour into the prepared baking dish. Bake until pudding is set and firm on top, about 35 minutes. Remove from oven to a wire rack, and begin making the toffee sauce. 
  6. Toffee Sauce: Combine the butter, heavy cream and brown sugar in a small heavy saucepan; heat to boiling, stirring constantly. Boil gently over medium low heat until mixture is thickened, about 8 minutes. 
  7. Preheat broiler. Spoon about 1/3 cup of the sauce over the cake. Spread evenly on top. Place cake under the broiler until the topping is bubbly, about 1 minute. 
  8. Serve immediately (hot), spooned into dessert bowls. Drizzle with toffee sauce and top with a spoonful of whipped cream or ice cream.
Note:  I'm not a big fan of any desserts that have dried fruit/raisins in them - I just don't like the texture.  As such, I didn't think I'd like this cake at all.  Fortunately, the dates soften with the boiling water and then dissolve while baking!  Don't omit the dates - they add so much to the flavor of the cake. 

Shortbread

Here is another English classic from Alex's mom, one that we always see around here at Christmastime.  I love shortbread, and this recipe is buttery, slightly sweet, and just perfect with a cup of hot chocolate.


Shortbread
Recipe from Janet Diestler

Ingredients:
  • 1 pound plus 1 tablespoon butter, softened
  • 1 cup superfine sugar
  • 5 cups all purpose flour, sifted before measuring
  • Crystal sugar for sprinkling
Directions:
  1. Pre-heat oven to 350.  Using a pastry brush, coat a large rimmed baking sheet with 1 Tablespoon of the softened butter.
  2. Beat 1 pound butter and 1 cup sugar until light and fluffy.  
  3. Add the flour, one cup at a time beating well after each addition. 
  4. Press into baking/cooking sheet and smooth with the rolling pin.
  5. Cut into strips and mark diagonally to make diamond shapes.  Prick with fork. 
  6. Bake in middle of oven for 25-30 minutes until delicately brown and firm to the touch. 
  7. Sprinkle with crystal sugar and re-cut score lines while still hot.
  8. Cool completely.  Store in an air-tight container.
 

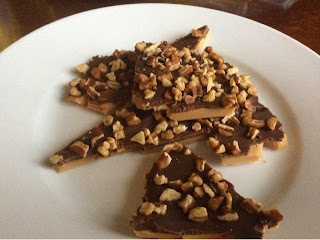
English Toffee

This is another one of Alex's Christmas candy specialties, one that is usually a favorite amongst our friends and family.  What's unique about this toffee is that it's slightly under-done so it doesn't stick to your teeth!  My sister requested that Alex teach her how to make it while she was here over the holidays - she wanted to take some for the road!


English Toffee
Recipe from Janet Diestler

Ingredients:
  • 1 cup sugar
  • 1 cup butter
  • 3 Tablespoons water
  • 3-4 Hershey bars (definitely use Hershey brand)
  • finely chopped pecans
Directions:
  1. Line cookie sheet with foil, and lightly butter the foil (do not use a glass dish)
  2. Cook sugar, butter, and water at full rolling boil until light caramel in color (if you think you've gone too far, it's probably just about right).  Stir continuously or it will burn. 
  3.  Pour onto prepared cookie sheet.  
  4. Position chocolate bars on top of toffee.  With a knife, spread the chocolate around as it begins to melt. 
  5. Sprinkle with chopped pecans while chocolate is still soft. 
  6. Allow to cool completely.  Break into pieces, and store in an air-tight container.

Amaretto Fudge

I'm not much of a fudge person, because it's typically too sweet for my taste.  However, Alex makes an amazing amaretto fudge every Christmas - and I look forward to it all year!  I don't know what it is about the chocolate and amaretto/almond flavor that I like so much - but it just feels right! 

This is a supremely creamy fudge inspired by the amaretto fudge sold at Cabella's.  Alex used the recipe on the marshmallow cream package, adapting it slightly. One of my favorite Christmas treats! 


Amaretto Fudge
Recipe adapted from Kraft Recipes

Ingredients:

For the bottom chocolate layer -
  • 3 cups sugar
  • 3/4 cup butter or margarine
  • 1 small can (5 oz.) evaporated milk (about 2/3 cup) (Do not use sweetened condensed milk.)
  • 1 pkg. (11.5 oz) Semi-Sweet Chocolate Chips
  • 1 jar (7 oz.) Jet-Puffed Marshmallow Creme
  • 1 tsp.  vanilla

For the top amaretto flavor -
  • 3 cups sugar
  • 3/4 cup butter or margarine
  • 1 small can (5 oz.) evaporated milk (about 2/3 cup) (Do not use sweetened condensed milk.)
  • 1 pkg. (11.5 oz) white Chocolate Chips
  • 1 jar (7 oz.) Jet-Puffed Marshmallow Creme
  • 1 tsp. almond extract
  • A few drops of red food coloring
Directions:

For the bottom chocolate layer -
  1. Line 9x13-inch pan with foil, with ends of foil extending over sides. Bring sugar, butter and evaporated milk to full rolling boil in 3-qt. saucepan on medium heat, stirring constantly. Cook 4 min. or until candy thermometer reaches 234°F, stirring constantly. Remove from heat.
  2. Add semi-sweet chocolate chips and marshmallow creme; stir until melted. Add vanilla; mix well.
  3. Pour into prepared pan; spread to cover bottom of pan. At this point, begin making the amaretto layer immediately.
For the amaretto layer -
  1. Basically following the same directions from the bottom layer: bring sugar, butter and evaporated milk to full rolling boil in 3-qt. saucepan on medium heat, stirring constantly. Cook 4 min. or until candy thermometer reaches 234°F, stirring constantly. Remove from heat.
  2. Add white chocolate chips and marshmallow creme; stir until melted. Add almond extract and a few drops of red food coloring; mix well.
  3. Pour mixture on top of bottom chocolate layer (its okay if this bottom layer has not completely cooled - this is actually preferable, at it helps to fuse the two layers together).  
  4. Let cool for two hours, and only slice the squares you are about to eat (keeping it all together and not pre-slicing into squares keeps the fudge moist and creamy).  Store in an air-tight container. 

Peppermint Bark

The first time I had peppermint bark was in college.  This cute boy brought over a plate of homemade candy that his mom had sent, and this was my favorite item on the plate!  Since then, I've had peppermint bark every Christmas - as that cute boy was Alex!

This is a painfully easy recipe, and a perfect Christmas gift if you're short on time.  Just be sure to use a good quality melting chocolate (not the bars found in the grocery store).  I also found the candy canes pre-chopped at Jewel and World Market, and it makes this recipe even easier!


Peppermint Bark
Recipe from Janet Diestler

Ingredients:
  • 1 pound dark chocolate melting wafers or chips
  • 1 pound white chocolate melting wafers or chips
  • 3-6 candy canes, chopped up into small pieces (depending on how minty you like it)
Directions:
  1. Line baking sheet with aluminum foil, and very lightly butter. 
  2. With a double-boiler, slowly melt the dark chocolate, stirring constantly. 
  3. Once melted, pour on to baking sheet and spread to desired thickness (usually about 1/4 of an inch). 
  4. Place in refrigerator to cool, and start melting the white chocolate with the same method. 
  5. Once white chocolate is melted, pour on top of dark chocolate (its okay if the dark chocolate hasn't set up perfectly - it'll make the two chocolates stick together). 
  6. Immediately sprinkle mint chips on top of white chocolate, and slightly pat down.  Place in fridge to cool, before splitting into pieces with a fork.
Note:  When serving this dish with other candies, be sure to place them in a separate container or bag - otherwise all your candies will taste like mint!

Carmels

I have tried to make caramels several times in my life, yet the result is always a bit disappointing.  Either I undercook it and the carmels are a sticky mess, or I over-cook it and end up with hard candy tasting like burnt sugar.  Two years ago, I found a recipe online that had rave reviews, and carfully purchased all the expensive premium ingredients and followed the recipe with exactness.  Two hours of continuous stirring later, I ended up with burnt, teeth-breaking carmels - not good.

I was so frustrated, so I threw the whole things away and searched for the most simple recipe I could find online with ingredients I already had in the home.  I found this recipe on my friend Liberty's blog, and it is a home-run!

We always take a plate of homemade candy to our friends for Christmas, and these carmels usually make the cut (along with some additional candy recipes I'll be posting next).  They are so simple, and I always get many compliments.


Carmels
Recipe from Mac's Menu 

Ingredients:
  • 2 C Sugar
  • 1 C Light Karo Syrup
  • 1/2 C. Butter
  • 1 Can of Evaporated milk or 1 1/2 C Cream (I usually use cream)
Directions:
  1. Butter parchment paper, and place into a 9x9 pan; set aside. 
  2. In a medium bowl, microwave butter and milk/cream until warm and butter is slightly melted, about 1-2 minutes. Set aside.
  3. Combine sugar and Karo Syrup in large stockpot. Bring to a boil and boil until mixture is at the soft ball stage, or 240 degrees.
  4. At this point, slowly pour the butter/cream mixture into sugar/Karo mixture. Try to keep the sugar/Karo boiling while you add the butter/cream mixture.
  5. Continue to boil until 230 degrees, or very soft ball. -- Note: I usually boil until 234 degrees, as it gives me just the right carmel consistency.  This will be different depending on where you live and how accurate your candy thermometer is, but this is what works for me.  
  6. Remove from heat and stir in 1/2 tsp baking soda.
  7. Pour into 9x9 pan. Let carmels sit overnight, before cutting into squares with a sharp, buttered knife (I pull the carmels right out of the pan using the edges of the parchement paper, place it on a cutting board, and slice away -- so easy!). Wrap each piece in wax paper to maintain freshness.

The BEST White Bread

By George, I've found it!  The most soft, subtle, heavenly white bread there ever was, is currently, or will ever be!  Seriously, this stuff is life-changing!  I've searched my whole life for the perfect white bread recipe, and now I can die feeling fulfilled in my bread-baking abilities.  Okay, not really - but you get the picture.

I know I use superlatives a lot on this blog, as in "this is the best {fill in the blank} that ever existed," but just know that if I can't say that truthfully about a dish I'm making, then I don't post it here on my blog.  

Last Fall, I learned how to make this bread at a class my sister and I took at King Arthur Flour in Norwich, Vermont. 


I've made this bread probably about a dozen times since then, and it never lasts long.  I even made a loaf for each of my neighbors for Christmas, alongside some honey butter and homemade strawberry freezer jam - and delivered it warm over several nights in December.  Nothing is better than bread fresh out of the oven and I received so many compliments, including one neighbor that earnestly said, "I don't know how I'll ever repay you."  Too funny.


The recipe is outstanding, but the technique is even more important.  I'll try to include all the tips I learned in italics. 

The BEST White Bread
Recipe from King Arthur Flour

Ingredients:
  • 5-6 cups unbleached all purpose flour (I use King Arthur for best results, and usually use about 5 1/2 cups total)
  • 1/4 cup dry milk
  • 1 tablespoon sugar
  • 2 1/4 teaspoons instant yeast (the Meijer brand works best for me)
  • 2 teaspoons salt
  • 2 tablespoons butter, room temperature
  • 2 cups warm water
Directions:
  1. Measure 3 cups of the flour into a medium bowl, and add the dry milk powder, sugar, yeast, and salt.  Cut the butter into small pieces and stir into the dry ingredients.
  2. Pour the warm water into the mixture and beat to blend well. 
  3. Stir in the remaining flour gradually until the dough forms a shaggy mass. 
  4. Turn the dough out onto a lightly floured surface to knead gently*, incorporating the remaining flour until the dough becomes soft, elastic, and slightly tacky - though not sticky enough to stick to the counter. This process usually takes me about 8-10 minutes.
  5. Allow the dough to rise in a lightly greased bowl, covered with plastic wrap until it has doubled in bulk, about 1 to 1 1/2 hours. 
  6. After the dough has risen, gently degas** it. Divide in half and form the loaves into the desired shapes. Place in lightly-greased loaf pans.
  7. Cover the loaves with plastic wrap and allow to rise until nearly doubled, about 30-45 minutes  (my rule of thumb is that once the dough has risen 1-inch above the bread pan, it's ready to go in the oven).
  8. Bake in a preheated oven at 375 for 25-40 minutes (my bread is done in 28 minutes exactly), until the crust is golden brown and the loaf sounds hallow when tapped.
*One of the most important tips I learned at this class was to knead your bread gently - which is totally opposite of what I've always done.  Be very soft, and apply very little pressure.  The teacher told us if our shoulders were scrunched up by our ears, we were kneading too hard.  It's hard to get used to, but truly does make for a softer, more supple bread. 

**After the first rise, I've always punched down the dough.  I learned that this is a big no-no (again - we should try to be as soft as possible with the dough).  The best way to remove the excess air after the first rise is to empty the dough out of the bowl onto a lightly floured surface, and let it sit for a minute.  Then lightly pat out any extra air.  It's a technique called "Degassing."
 

Wednesday, January 7, 2015

Cheesy Fondue

Alex always treats me to fondue for my birthday dinner - usually at a place like Melting Pot or Redstone.  Shortly before my birthday, I saw that one of my favorite food bloggers had posted a recipe for fondue, so I asked Alex to make it for my special dinner.  It was so, so good!

Later on in the year, we served it for a New Year's party we were having and it was a hit!  Our guests couldn't get enough.  We served it with seasoned chicken, granny smith apples, grapes, carrots, broccoli, and crusty bread.  I think we may be adding this recipe to our monthly meal rotation, because I just couldn't get enough!


Cheesy Fondue
Recipe from Mel's Kitchen Cafe

Ingredients
  • 2 cups lightly packed shredded Gruyere cheese (about 8 ounces)
  • 1 1/2 cups lightly packed shredded Swiss cheese (about 6 ounces)
  • 2 tablespoons cornstarch
  • 1 cup low-sodium, good-quality chicken broth
  • 1/8 teaspoon lemon juice
  • 1 tablespoon finely minced or pressed garlic
  • 1/4 teaspoon ground black pepper
  • 1/4 teaspoon nutmeg
  • Dash of paprika
  • 1/4 teaspoon Mirador seasoning*
Directions
  1. Place both the shredded Gruyere and Swiss cheeses in a gallon-size resealable bag with the cornstarch and shake until evenly coated.
  2. In a stovetop-safe fondue pot or double-broiler, add the chicken broth, lemon juice, and garlic and bring to a simmer. Reduce the heat to medium-low. Add the cheese, a small handful at a time, stirring constantly, but not briskly. It works best to use a wooden spoon and and stir in an S-shaped motion, making sure to scrape the bottom of the pot so it doesn't burn.
  3. Once the cheese is melted and begins to just barely simmer, add the remaining spices and move it immediately to the fondue stand with the sterno flame or tea-light candle below. It should be the consistency of warm honey. Add more or less cheese for perfect consistency and additional salt and pepper to taste if needed. 
*This is a hard-to-find-seasoning, but Alex found a similar version at a spice shop in Naperville. 
If you can't find it, just leave it out of the recipe - it will still turn out great!

Almond-Flavored Chocolate Cake

We first had this cake at a church activity, and it has since become my very favorite chocolate cake!  I love the chocolate/almond flavoring combination, and this rich dessert was right up my alley.


We actually got into a bidding war for this cake at a church service auction, and $37 later - we won.  It was a lot to pay for a cake, but worth every penny!


Almond-Flavored Chocolate Cake
Recipe from Gerrie Miller

Ingredients:

For the Cake -
  • 1 oz. Unsweetened chocolate, coarsely chopped
  • 1/3 cup water
  • 1 package Duncan Hines devils food cake mix
  • 1 cup buttermilk
  • ½ cup vegetable oil
  • 3 large eggs
  • 1 tsp. Almond extract
For the Frosting -
  • 1 package (8oz.) cream cheese, softened
  • 1 stick butter, softened
  • ½ cup unsweetened cocoa
  • 1 tsp. Almond extract
  • 4 cups powdered sugar, sifted
Directions:
  1. Preheat oven to 350.  Lightly grease a 9"x13" glass cake pan.  
  2. Heat the chopped chocolate and water in microwave for 2 minutes. Stir and set aside to cool for about 10 minutes. 
  3. Place the cake mix, buttermilk, oil, eggs, almond extract, and melted chocolate mixture in a large mixing bowl. Blend with a mixer for 1 minute on low speed. Scrape down sides and mix for 2 minutes more on medium speed. 
  4. Pour batter into pan and bake for about 35-40.
  5. Once the cake is completely cooled, make the frosting by beating the cream cheese and butter in a bowl. Add the cocoa, almond extract, and powdered sugar. Beat on high till turns a lighter color but don’t overdo or you’ll end up with too much air in it and you’ll have little bubbles in it.

Strawberry Freezer Jam

While we were in Utah last summer, I could not get enough of my mom's strawberry freezer jam - and keep in mind, I'm not really a jam person!  She would serve it over breakfast pop-overs, and they were heavenly. 


My mom explained that this jam was so easy to make, and all you have to do is follow the directions on the Sure-Jell packet.  As soon as I got home, I did so and the jam I made was amazing - but I was shocked at how much sugar was in it!  Seriously - it was like 2 cups of strawberries to 4 cups sugar!  No wonder I liked it so much.

I did a little research, and found that Sure-Jell makes a less sugar solution.  I made a batch of it for comparison's sake, only to find out that it tasted even better!  The taste of the strawberries came through brightly, and it was such a fresh and slightly sweet sensation.  I was hooked.

Needless to say, we have worked our way through this jam quickly.  And I'm kinda bummed, because its winter and the strawberries are expensive now.  Though in-season strawberries are usually preferable - off-season strawberries work great too!  Slightly under-ripe fruit has more pectin, and it makes this jam set-up beautifully.


Strawberry Freezer Jam
Recipe from Kraft Recipes

Ingredients:
  • 4 pt. Strawberries
  • 3 cups  sugar, measured into separate bowl 
  • 1 box  SURE-JELL For Less or No Sugar Needed Recipes Premium Fruit Pectin 
  • 1 cup  water   
Directions:
  1. Rinse clean plastic containers and lids with boiling water; you'll need about 8 - 1 cup containers. Dry thoroughly.  
  2. Crush strawberries thoroughly, one layer at a time. Measure exactly 4 cups crushed strawberries into large bowl.   
  3. Mix sugar and pectin in large saucepan. Stir in water. Bring to boil on medium-high heat, stirring constantly. Boil and stir 1 minute. Remove from heat. Add strawberries; stir 1 minute or until well blended.  
  4. Fill all containers immediately to within 1/2 inch of tops. Wipe off top edges of containers; immediately cover with lids. Let stand at room temperature 24 hours. Jam is now ready to use. Store in refrigerator up to 3 weeks or freeze extra containers up to 1 year. Thaw in refrigerator before using.  

Cafe Rio Sweet Pork Burrittos (Copy-Cat)

Oh how I miss Cafe Rio!  Those of you who have ever spent any time in the West can relate - there's nothing better!  Qdobe, Chipotle - both substandard compared to the goodness that is Cafe Rio.  Whenever we go to Utah for a visit, the first place we hit up is Cafe Rio.

Nothings beats their sweet pork burritos served enchilada style.*  There are about a million and one copy-cat recipes floating around the internet, with first-hand accounts of someone who "swears they saw the Cafe Rio manager put this and that" on the sweet pork.  I've tried almost all of them, and none come even close to the real deal.

Until now.  This recipe isn't a perfect match, but it's about 90% there.  And being 1,500 miles away from the nearest Cafe Rio, I'll take what I can get!


Cafe Rio Sweet Pork
Recipe from someone in my Mom's ward, though I don't know who

Ingredients:
  • 4 lbs. Pork Butt Roast 
  • 4 8 oz. cans tomato sauce
  • 3-4 tsp. minced garlic cloves
  • 2-4 C. brown sugar, depending on how sweet you like it (I usually do 3 cups)
  • 4 tsp. cumin
  • 4 C. Dr. Pepper (not diet)
  • 3 T. molasses (unsulfured)
  • 1/2 tsp. salt
  • Pepper to taste
Directions:
  1. In a large bowl mix tomato sauce, brown sugar, cumin, Dr. Pepper, molasses, salt and pepper.  
  2. Spray slow cooker with Pam spray, and place roast in cooker.
  3. Pour 1/2 liquid ingredients over pork and cook on low for 7-8 hours.  Start checking it after 5-6 hours. 
  4. When the roast is very tender and falling apart, take it out of the cooker to rest on a platter. 
  5. Remove liquid in crock pot for disposal, but taste a small amount of the liquid for sweetness. 
  6. Shred pork roast with 2 forks, put back in slow cooker. 
  7. Pour the remaining half of mixture over pork (adding more brown sugar or molasses if needed) and let cook on high just to heat through, about 15-30 minutes. 
*To make them enchilada style, place some of the pork, black beans, and cilantro rice into a tortilla, and roll into a burrito.  Place in a oven-safe dish, pour green enchilada sauce on burrito, and top with Monterrey jack cheese.  Place in 350 degree oven for for 5-10 minutes, until cheese is melted. 

This makes a ton (especially for two people), so after we eat what we want, I assemble the burritos and freeze.  Then I just take one or two out at a time, microwave for one minute.  Then top with green enchilada sauce and cheese, and microwave for another minute.  Tastes amazing!